

Through the lens metering with a Field/View camera
or Ground Glass Metering
I admit it right up front, I'm a gadget nut. That's one of the reasons I like photography. Yes, I can have fun with a point & shoot, but give me a 'system' with a bunch of add-on gadgets and see me smile. Well, after I figure out how to use them anyway... And that's the story with through the lens (ttl) metering with a view camera, or measuring off the ground glass (GG).
Below are two methods for measuring off the GG. The first is the one I thought of before I could find any help or documentation. The second is the official Sekonic method. Both work. The Sekonic method is probably simpler...
I was lucky enough to get a used fiber optic probe for my Luna Pro F and wanted to try GG metering. Had no idea how and used stuff rarely comes with instructions, so I asked (newsgroups). Got a lot of different answers. Some good, one great, some not so good. Basically, what I had figured out in the first place worked just fine and is easy enough to use, so I'm putting it here for other people who might be interested.
The first step is to find out the correction factor for the probe itself. Even glass does not transmit 100% of the light and fiber optics are worse. Figuring this out is very easy. First, point the meter at a standard grey card and get a good reading. Then add the probe to the meter and take another reading off the grey card. Make sure you don't meter any shadows in the process and the light is the same for both. For the Luna Pro and fiber optic probe, the difference turned out to be 3 stops. After finally finding a set of instructions, this is also what Gossen says. Nice to see some things work as designed ;-) But don't assume the factor will be as published or even remain the same. Even Gossen recommends checking it because fiber can break cutting down the light transferred through the cable.
So for the Luna Pro when using the probe, just set the correction dial to +3. Yes, PLUS 3, to make up for the 3 stops of loss from the probe.
That's the easy part and where everyone agrees. The correction for the GG and lens is where everyone has differences, so here's mine...
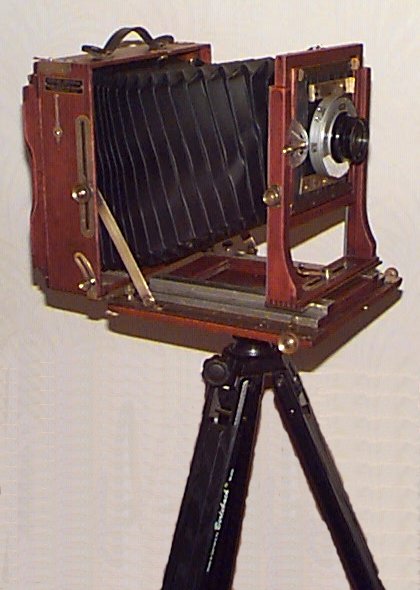
Set up the camera on a tripod and open the lens. Also Make sure the lens is wide open aperture-wise. Make sure the camera is focused for infinity. This is important for later bellows extensions. Now point the camera at the same grey card and take a reading off the GG. The trick here is to find the correction that will give you the same exposure as metering just the grey card using the probe, but not through the camera. Okay, I may not be that good at explanations so here goes an example...
Meter with no probe off grey card reads 1/60 at f-22.
Meter with probe off grey card reads 1/60 at f-8. 3 stops less.
3 stop correction on meter brings probe reading back to 1/60 at f-22.
Meter through camera on GG with probe reads 1/60 at f-5.6.
Now we can figure the total correction. We know the reading should be f-22 (keeping the speed equal). f-5.6 to f-22 is 4 more stops. So we set the meter to correct for a total of 7 stops.
So, for this camera, lens, GG and meter, the correction is 7 stops. Any reading taken of the GG will be accurate even if the lens is stopped down or the bellows is extended for close-up work. Just remember that if anything is changed, the correction factor will also change. Most of us wouldn't have to worry about a change in the camera, GG, meter or probe, but we do change lenses. A new factor would have to be figured for each lens. But, if all the equipment stays the same and only the lenses change, the factors will remain constant for each lens and that could be recorded so it would only have to be calculated once! This could be written right on the lens (label on lens board?) or a chart made up and held with the meter...
Okay, that was simple. But I do love gadgets, and they do make a probe for my Sekonic L-718 digital meters. I even got the instructions with this probe! Unfortunately, the translation isn't the best and they do things a bit differently. So off I went to see if things would work 'my way'.
First problem... The L-718 doesn't have a correction factor capability! Didn't even think of that when I bought them... But you can change the ASA (ISO) while holding a reading. So let's try that... Didn't have to figure out the factor for the probe. 2 stops, as stated in the instructions ;-) So a 100 speed film would be set to 400 when using the probe. Then trying the above method, all I did was measure the grey card for the first reading. Then measure through the camera for the second. While watching this second reading, I held the ISO button and started increasing the ISO of the film until I got the same exposure as the first reading. Works just fine! I haven't checked if it has enough range yet though. Think about starting with a 400 speed film and going 7 stops... Ummm, that's a speed of 51200. Ooops, meter only goes to 8000... I'll have to work on that a bit more... Who says the new digitals are better than the 'old' meters? Well at least it will work for the slower films and they are darn good meters. I think I'll keep them ;-) But the Luna Pro F goes with the big cameras ;-)
I really thought this would be a longer explanation. Turned out a whole lot simpler than I thought, and shorter. So if anyone is actually interested in this and needs more explanation, or if anyone has any other suggestions, I'd be more than happy to oblige...
Method Two, the Sekonic way
After a little experimentation and re-reading the documentation, I thought I would also include the 'Sekonic' way of GG measuring. This is also essentially the same method suggested when I had asked around and does have some benefits.
This will be basically specific to the Sekonic L-718 with the PinPoint adapter. The procedure itself should work for any meter with a fiber optic probe.
First, the correction factor for the probe. Simple here, it's given in the instructions ;-) But veryfied! A 2 stop increase is needed. So for our 100 speed film, we would set the meter at ISO 400 sinbe there is no 'correction factor' available on the meter.
Now for the major differences.
Next we find the factor for the GG itself. They recommend using a lightbox and removing the GG from the camera. This is probably a bit more accurate, but I'll leave mine in the camera and use my old faithful grey card... So set the meter at ISO 400 (2 stop correction) with the probe attached and the meter set for EV measuring. Measure the grey card to get the first reading. Now measure the same light & grey card through the GG, with NO lens! The difference between the two reading is the correction factor for the GG. On my camera, this came out to be 0.7. So we add the 2.0 correction for the probe to the 0.7 for the GG and we come up with a total factor of 2.7. Nope, I can't relate this directly to ISO/ASA speeds or even f-stops... So what I did was measure the old grey card and change the ISO speed until I got the same difference in EV readings. This brought the ISO of our 100 speed film to 640 (yeah, 2.7 is close to 2.5)...
Now the easy part. Put the lens back on your camera, point it at something and focus. Set your meter for the 2.7 correction factor (640 ISO instead of 100 ISO) and set the meter to F-priority mode. This means the speeds will change after you set an f-stop. Now set the f-stop to 1.0, the lowest setting. Put the probe on your GG and take a reading. The speed shown will match any aperture you have set on the lens and automatically adjust for any lens type & speed you place on your camera. Here's the simplified, one line steps...
Find the correction factor of your probe in EV.
Find the correction factor of your GG in EV.
Add these two together for the total correction factor, mine is 2.7.
Find or calculate an ISO/ASA speed that matches your film to this correction factor.
Put the probe on the meter and set this new ISO/ASA speed.
Set the meter for F-priority.
Measure the correct speed off your GG for any lens/f-stop combo you've got.
This method does work. Although I have to admit it seems to give me some problems. Maybe it just doesn't work for me or it doesn't fit my brain patterns? But it's simpler and should give accurate readings, so I'm going to play with it a bit more...
To get around our site, just click on one of the menu above.
Send e-mail to Rich
Entire site contents
© 1999-2015 South Bristol Views
Modified on